
Ever looked at your copper items and wondered how to keep that warm, inviting glow shining bright? Even when it changes its color over time and tarnishes.
Copper, with its rich, reddish hue, adds a touch of elegance to anything from kitchenware to jewelry. But, let’s face it, keeping it spotless and gleaming can sometimes feel like a puzzle.
In this guide, we’re deep-diving into copper care. As we journey through this article, you’ll discover various cleaning methods, from quick and easy home remedies to more thorough techniques for those stubborn tarnishes. Ensuring your items stay as dazzling as the day you got them.
Whether you’re a culinary enthusiast looking to spruce up your copper pans, a fashionista wanting to keep your jewelry in top shape, or simply someone who loves the allure of copper decor, this guide has got you covered.
So, roll up your sleeves and get ready to give your copper items the tender love and care they deserve. By the end of this article, you’ll be equipped with all the knowledge on how to clean copper so that it looks its best effortlessly.
Overview of How to Clean Copper

Before we get our hands dirty with the cleaning process, let’s take a moment to understand our subject: copper. You see, copper is a fascinating metal with a rich history that dates back thousands of years.
Ancient cultures revered copper for its malleable properties and warm, reddish-orange hue, making it a favorite material for artisans and builders today.
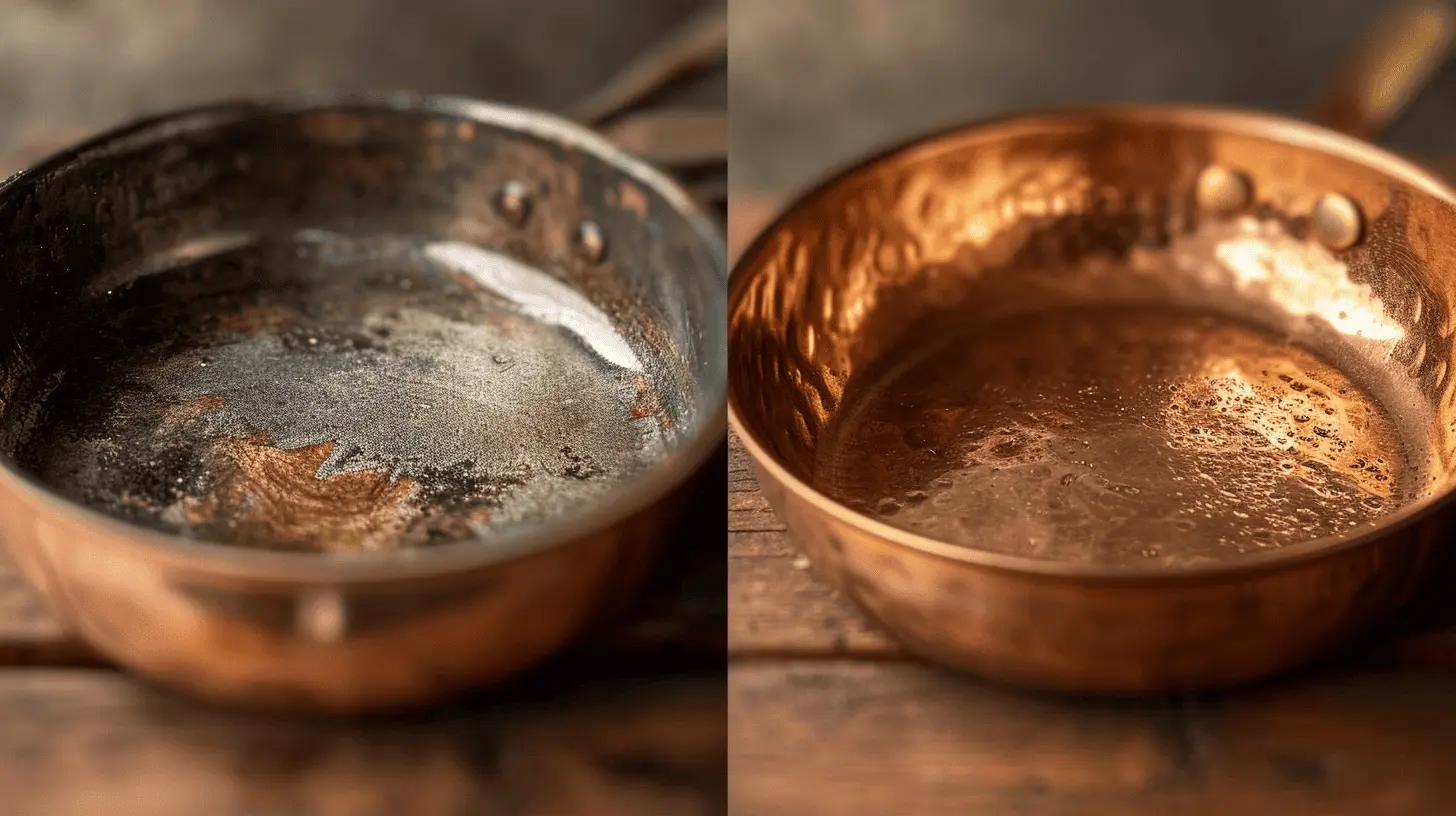
Like many other metals, copper is prone to tarnishing when exposed to air and moisture over time. Tarnish isn’t just unattractive; if left untreated, it can lead to corrosion, significantly diminishing the durability and longevity of your beloved copper items.
You see, copper is an inherently reactive metal with an innate tendency to react with substances in its environment – oxygen in the air, acid in food, or even oil on your skin.
Interestingly, this reactivity also gives copper its potential for patina – a greenish layer that forms on its surface over time. Some people appreciate this unique aesthetic appeal, while others may not favor it as much.
Understanding this process is crucial because when we’re cleaning copper, we’re essentially reversing this copper oxide. So you see, cleaning isn’t just about removing grime or restoring shine.
Basic Cleaning Technique
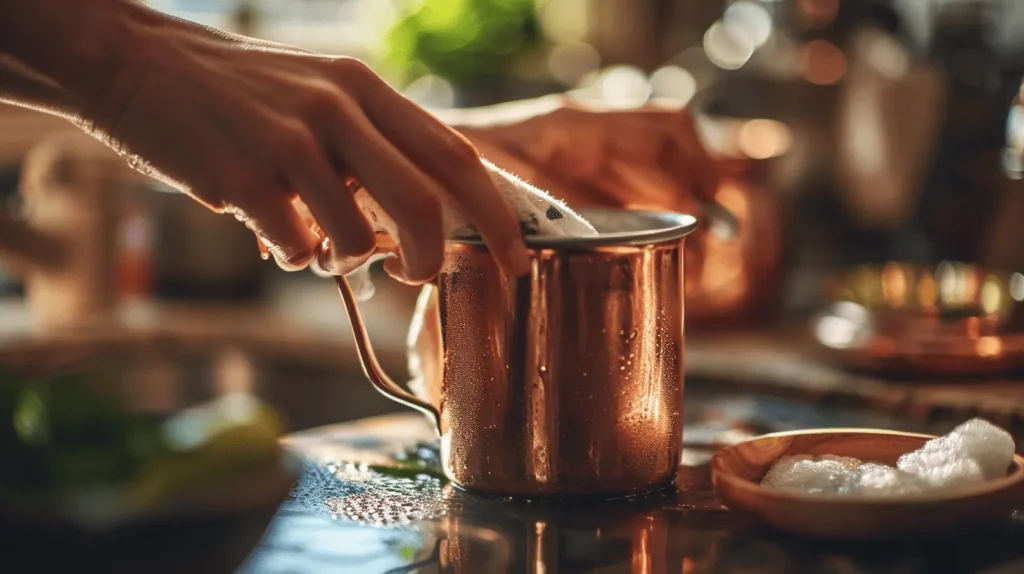
Routine Cleaning Method
- Fill up your sink with warm water, add a few drops of mild dish soap (avoid anything too acidic or abrasive), then scrub your copper item with a soft cloth or sponge. The key here is to be gentle; you don’t want to inadvertently scratch the surface.
- After washing, rinse thoroughly under running water and dry immediately using another clean, soft cloth. Alternatively, you could also use commercial copper cleaners for routine cleaning.
These specially formulated products are designed to cleanse and polish your precious copper items effectively without causing any harm. Apply as directed on the product packaging, usually by rubbing it into the surface using a cloth or sponge in circular motions, then rinsing off afterward.
Remember this golden rule: regular care makes deep cleaning less necessary! By promptly dealing with spots or stains as they appear and doing routine clean-ups occasionally, you’re saving yourself from having to do more rigorous—and possibly damaging—cleaning methods down the line.
Basic DIY Cleaning Solutions
Lemon Juice + Salt
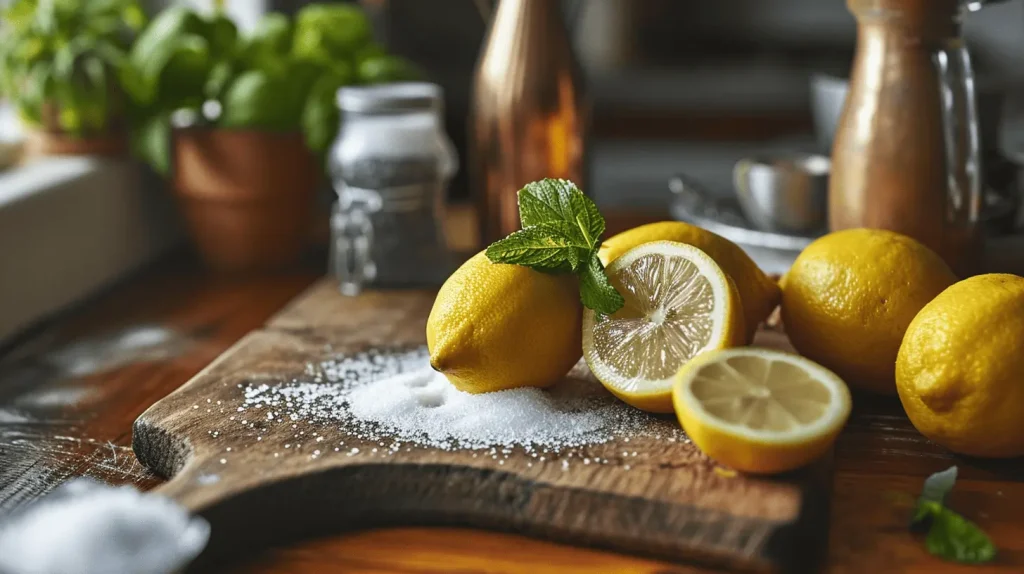
The first home remedy involves only a humble lemon juice and table salt. Just cut the fruit in half, sprinkle a good amount of salt, and rub it over the tarnished copper.
You’ll see an immediate reaction as the citric acid works wonders on the oxidation layer. Remember to rinse thoroughly post-treatment to avoid any leftover residue.
Vinegar + Baking Soda
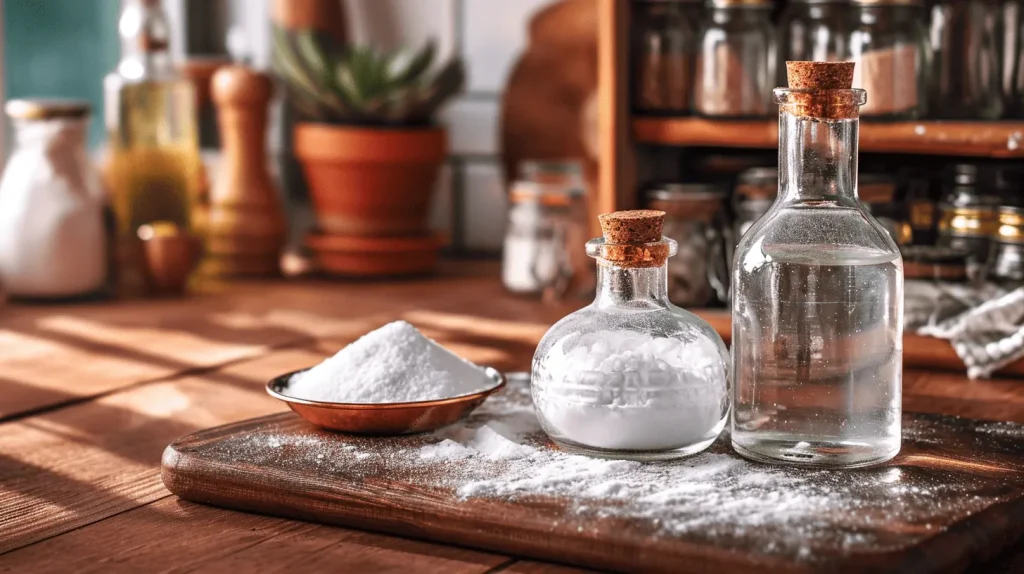
If you’re dealing with more stubborn tarnish, we can amp up a notch with household vinegar and baking soda. Combine equal parts of them until you get a nice paste consistency.
Then, slather this concoction onto your item using an old toothbrush or sponge and let it sit for about fifteen minutes before rinsing it in warm water.
Ketchup

Another DIY solution you might have yet to hear about is ketchup- yes, you read that right! The acetic acid found in it can effectively remove tarnish from copper items when applied liberally and rest for 20 minutes before washing off.
Advanced Cleaning Methods

Now, moving on to more advanced methods to clean copper, it’s important to remember that these should be reserved for those stubborn stains and marks that your routine cleaning efforts can’t seem to shift. The kind of deep-set tarnish that makes you wonder if it’s part of the copper itself.
Dealing with Stubborn Tarnish
Copper, while resilient in many ways, can fall victim to stubborn tarnish that simple cleaning techniques can’t always handle. This doesn’t mean you need to throw in the towel; you might have to roll up your sleeves more. Tackling stubborn tarnish begins with identifying it correctly.
It usually appears as a dark or greenish hue on your copper item. This discoloration occurs over time when the copper reacts with environmental elements like moisture and oxygen. It’s not harmful per se but eliminates that bright, warm glow we all love about copper.
A popular method involves mixing a paste of equal parts vinegar and flour with some salt. Apply this concoction onto the affected area — don’t be shy — and let it sit for about 30 minutes to an hour before rinsing off with warm water.
Immediately after rinsing, dry thoroughly, as standing water can tarnish copper again. Then, this will have to repeat again.
Ingredients:
- Vinegar (1 cup)
- Flour (1 cup)
- Salt (1 Tablespoon)
Professional Products for Copper Cleaning
When it comes to copper cleaning, many professional-grade products are available on the market. These are designed to clean your toughest copper stains, providing an intensive clean while being gentle enough not to damage the material’s surface.
These products come in all forms and functions, from creams and lotions to sprays and wipes. Primarily used by antique dealers and museum professionals, some of these solutions can also be found in local hardware or home stores.
They contain mild abrasives that erase tough discolorations without scratching the copper surface. Be sure to read the labels and instructions before using them, as their application might vary from product to product.
Preventive Measures
You’ve spent the time learning about how to clean copper – so now let’s talk about how you can minimize the need for deep cleaning in the first place.
Regular upkeep can work wonders in maintaining the shine and luster of your cherished copper items. Instead of leaving it until the tarnish has fully set in, make it a habit to give your copper a quick wipe-down after each use. This will help prevent dust accumulation and keep minor tarnish at bay. Now, what kind of cloth should we use?
Choose a soft cloth like microfiber or an old t-shirt cut into rags, as these materials won’t scratch the surface. Stay clear from abrasive materials that may cause more harm than good.
As for handling, consider donning cotton gloves instead of bare hands when holding your copper belongings. Your skin produces natural oils that can react with copper over time, leading to discoloration – something we want to avoid.
Applying a thin layer of wax coating could be beneficial when your copper pieces are exposed continuously to open air, such as outdoor fixtures or garden ornaments. The wax is a barrier against environmental elements, including humidity, which accelerates tarnishing.
Good car wax would do fine; apply and buff following product instructions carefully. Suppose you live by the sea or in areas with high humidity levels. In that case, being extra diligent is critical due to increased exposure to moisture and salt – two factors that speed up oxidation, causing faster tarnishing.
And last but not least – storage! When not in use, store your treasures out of direct sunlight in a cool, dry place, preferably inside individual breathable bags or cloth wraps to protect against scratches and other potential damages.
Taking preventive measures will save you heaps of effort and time in the long run while keeping your copper items looking their best.
Regular Maintenance Tips
Regular maintenance is one of the best ways to keep your copper shining and looking at its prime. This doesn’t have to be an uphill task; you can incorporate it into your regular cleaning routine. First, clean your copper objects after each use.
For cutlery or cookware, rinse immediately after use to prevent food particles from sticking and causing stains. Always dry them off with a soft cloth, as copper is especially susceptible to water spots.
For decorative items that aren’t handled daily, you should dust them regularly using a soft microfiber cloth that won’t scratch the surface. Dust can accumulate and, over time, form a layer that dulls the shine of copper.
Give these items a more thorough cleaning with soap and warm water every few weeks, then dry them thoroughly. Remember not to let any liquid sit on the surface for too long, as this encourages patina formation – although some people find this appealing in certain vintage pieces!
If you prefer their copper shiny and vibrant, ensure it’s kept dry. Handle your pieces with clean hands since oils from our skin can cause tarnishing over time.
Regular maintenance will keep your beloved objects looking good and increase their longevity while minimizing the need for deep cleaning or professional restoration services down the line!
Closing Thoughts
Having explored the basic principles of cleaning copper effectively, as well as some advanced techniques for tackling particularly stubborn tarnish, you are now equipped to keep your copper objects in tip-top shape by using products that are both professional and DIY cleaning solutions.
Remember to remain patient during this process – achieving a lustrous sheen might take time and elbow work, but seeing the gleaming results is undoubtedly worth the effort.